Tutorial: Use Confluence to build a content collaboration space (Part One)

On my website, I have a success story from my career about how I led a cross-functional team of experts from sales, professional services, and customer support for my product. This team worked over 2-year period to create high quality technical content that would help our team to better sell our product to our customers, deliver innovative product solutions for their environments, and encourage product adoption. You can read the full success story for more details, but the upshot is that we were able to create 18 pieces of high quality content that empowered our team to solve problems for our customers.
As a follow up to that success stories, this blog series provides an in-depth tutorial explaining how you can use Confluence just like my team did. My team set up a space to collaborate and move new content ideas through the content creation workflow to the point where it is ready to be published. If you follow this guide, you’ll be able to use Confluence to help your cross-functional team to collaborate on technical content as well.
I’m using the tutorial template from The Good Docs Project written by my good friend and coworker Deanna Thompson to build this tutorial.
Overview of tutorial series
In this part one of this tutorial series, you’ll learn how to use Confluence to build a content collaboration space. You can use Confluence to build a workflow to help you product internal and external content to sell your product, deliver customer solutions, and increase customer adoption. The content this team produces can include product documentation, white papers, blog entries, knowledge base articles, sales battle cards, and much more.
What you will build in this tutorial series
Your Confluence content collaboration space will include these sections:
- Home page - When people first come to your space, they should see a home page with a search bar and links to the three main content areas: sell, deliver, adopt. This landing page also contains links to request new content.
- Sell, Deliver, Adopt - This section of the space will contain all of the completed (published) content that will help your team to sell, deliver, and adopt your product.
- Team and meetings - This section is for meeting notes and an “About the team” page.
- Plan of record - This is a sub-section of the teams page where you can track the progress of content that the team is currently building.
In this part of the tutorial series (part one), you will learn how to:
- Start a new Confluence space and add the main pages.
- Add content to the home page that includes a search bar and navigational buttons.
- Add the team pages that contains information about your team and their workflow, including meeting notes.
- Create a meeting notes template that includes a standard agenda to help your team stay on track in their meetings.
- Create a meetings page that will automatically list all of the team’s meeting notes created from the meeting notes template.
- Create an actions page that will automatically list any open action items that have carried over from the previous meetings.
In part two of the tutorial series, you will learn how to:
- Add content to the Team and Our Workflow pages.
- Create a content request template.
- Add a new content request button.
- Create the Triage needed page.
- List in progress content and other content statuses.
- Use your Confluence space in team meetings.
Who should use this tutorial?
This tutorial series is intended for cross-functional teams working on highly technical, enterprise-level software solutions. The team can include people from many areas, including:
- Documentation
- Development
- Sales engineering
- Professional services
- Customer support
- Product management
- Technical and product marketing
This tutorial series assumes your team has Confluence and knows about basic Confluence usage, including how to use it to create new pages and edit existing ones. The tutorial works for both the Cloud and self-managed or older versions of Confluence. For general Confluence support, I recommend reading the Confluence documentation.
If you don’t use Confluence at your work, you can build a proof-of-concept Confluence space on the cloud with a free account from Confluence.
Before you start
Before you start, you need to build the team that will create the content and ensure there is sufficient management buy-in from the team member’s management for them to participate. It helps to talk to key stakeholders that you will need to get support from first and possibly to have some initial discussions.
In my case, our team grew organically out of a standing one-on-one meeting I had with a sales engineer to work on turning some content he had created for customers into end-user documentation. Our team grew organically from there by holding a kickoff meeting with team members we thought would be good additions to the team. Eventually, the manager of the sales engineering team fully endorsed this project when she recognized it supported one of her key OKRs and advocated for her team members to join and participate regularly.
In that same vein, before you start the tutorial, you need to:
- Build your team.
- Choose the name of your team.
- Set up a standing weekly meeting that is 30 minutes long. (Try to keep it under 30 minutes to keep the meetings focused and disciplined.)
Create a new space and add the main pages
To get started, you need to create a new Confluence space for your team and add the main structure of the site. For now you’ll only create the placeholder pages and you’ll add the content later.
To create a new space and add the main pages:
- Create a team or project space using the Blank template. See Create a space from a template in the Confluence documentation for more information.
-
Give your space a name using your team’s name and set it to have the default permissions.
-
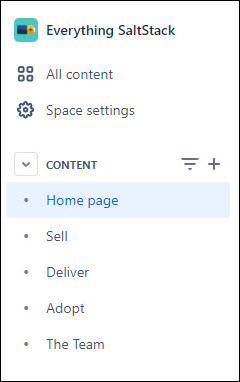
Create these pages and sub-pages:
- Home page
- Sell
- Deliver
- Adopt
- The Team
After completing these steps, your sidebar will look similar to this example:
Add content to the home page
The home page is a landing page where users inside the company can search for completed content. You’ll build a home page with a search bar, buttons to the three main sections of content (Sell, Deliver, Adopt), and some optional description text.
To add content to the home page:
-
Navigate to the Home page you created and start editing the page.
-
Type
Search for content:and format this text in bold. Center this text on the page. -
Press enter to start a new line and ensure your cursor is just below the line of text you just added.
-
Add the Live Search macro:
- Click Insert elements
 on the edit toolbar to open the macro search. Search for the
 Live Searchmacro. See Livesearch macro for more information. - Use these macro settings:
| Setting | Value |
|---|---|
| Space | Select your space name from the menu to define the search parameters. |
| Filter by type | Select all. |
| Filter by label | Leave blank. |
| Search bar text | Leave it set to the default setting: Search. |
| Size | Select large from the menu. |
| Search result format | Select page excerpt from the menu. |
- Directly under the search bar, use a table to add buttons to help users navigate to the Sell, Deliver, and Adopt pages:
- Click Table
 on the edit toolbar.
 - In the Table options menu, click Header column to change the formatting of the header row to a normal row.
- Remove extra rows or columns if needed.
- Change each cell's background to a light blue or another color if desired.
- Inside the first cell, add bold formatting and type Sell. Add a link to the text and link it to the
Sellpage that you created in step 1. - Repeat the previous step to add Deliver and Adopt to the other cells.
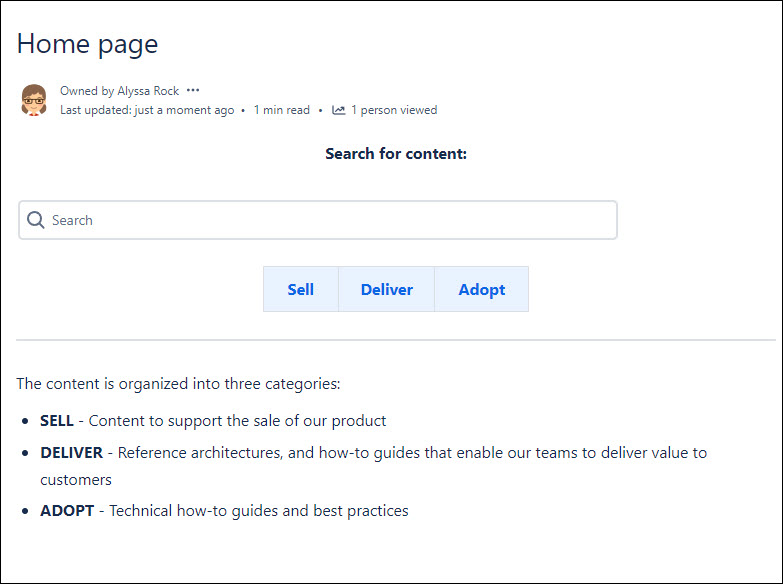
- Optional: Add text describing the content in the space. For example:
After completing these steps, your home page will look similar to this example:
Add the team pages and create a meeting notes template
Next, you need to build The Team section of the space, where your team will collaborate to create content. For this part of the tutorial, you’ll create the placeholder pages for this section:
| Sub-page | Description |
|---|---|
| Actions | Lists any open action items from past meetings. The action list is automatically generated by Confluence using the Task report macro from meeting notes. |
| Meetings | This page is mostly for team record-keeping. It lists meeting notes that are created using the meeting note template. |
| Our workflow | An informational page that describes the stages each content request goes through in order to get published. |
| Plan of record | This section has additional sub-pages. It is where the content that your team is currently working on will live while it's in progress. |
After creating the placeholder pages, you’ll use some of Confluence’s macros to set up a sophisticated meeting note workflow that will help your team’s productivity. You will start by setting up a template to record meeting notes that follows a standard agenda.
To build the sub-pages in the Team section and create a meeting notes template:
-
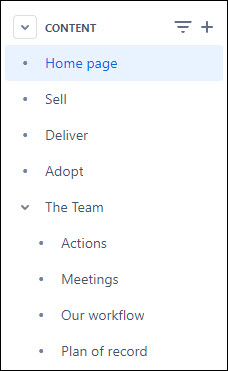
On the side menu next to The Team, click the Create button to create a new sub-page. Create these sub-pages:
- Actions
- Meetings
- Our workflow
- Plan of record
After this step, your side menu will look similar to this example menu:
-
Create a custom meeting notes template:
- Select Space settings from the sidebar.
- Under the Look and feel card, click Templates.
- Click Create New Template.
- For the title, type
Team meeting notes. You can use your team's name instead of the word "team". - Click the
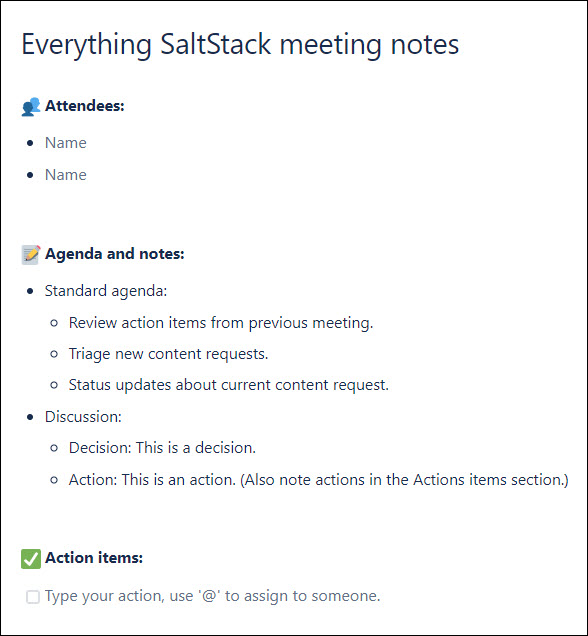
...on the editor menu (near the Save button) and select Add labels. Add themeeting-noteslabel. - Add content to the body of the meeting notes template, including:
- Attendees
- Agenda and notes
- Action items
After completing these steps, your meeting notes template will look similar to this one:
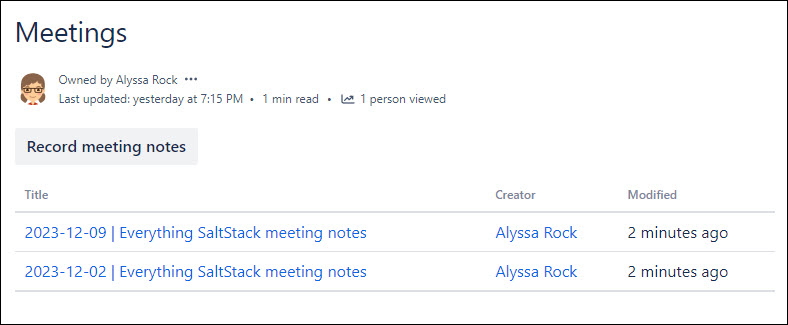
Create a meetings page
Now that you’ve built your meeting notes template, you can create a meeting page where users can click a button to use that template and record meeting notes. You will also build a page that automatically lists all the past meetings and links to the meeting notes.
To create a meetings page:
-
Click Meetings on the side menu to navigate to that page. Edit this page.
-
Add the Create from template macro:
- Click Insert elements on the edit toolbar to open the macro search. Search for the
Create from templatemacro. See Create from template macro for more information. - Use these macro settings:
| Setting | Value |
|---|---|
| Button text | Type Record meeting notes. |
| Template name | Select your custom meeting notes template from the menu. |
| Title of page to be created | Type @currentDate | Team meeting notes. |
| Space key | Leave the current settings, which will create the meeting notes in the current space. |
-
Press enter to start a new line and ensure your cursor is just below the new button you just added.
-
Add the Content Report Table macro:
- Click Insert elements on the edit toolbar to open the macro search. Search for the
Content Report Tablemacro. See Content report macro for more information. - Use these macro settings:
| Setting | Value |
|---|---|
| Labels | Type meeting-notes. |
| Space(s) | Select your space name from the menu. |
| Sort by | Select Page created from the menu. |
| Reverse Sort | Leave this box checked. |
| Show comments count | Leave this box unchecked. |
| Show Likes/Reactions count | Leave this box unchecked. |
| Maximum number of pages | Use the default setting: 20. |
- Optional: Test your workflow by creating a few meetings using the Record meeting notes button to ensure it uses your template. Try adding a few action items to the meeting by tagging yourself.
After completing these steps, your Meetings page will look similar to this example:
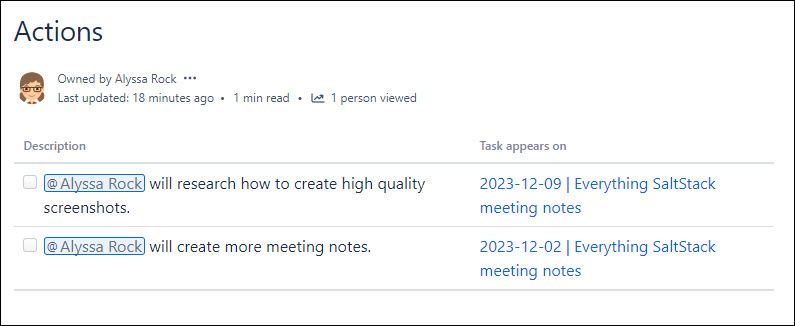
Create an actions page
Now that you’ve created a meetings page, you will create an actions page that will automatically capture any action items from the meetings and display them on this page. The action items page makes it easier for you to remind people of the commitments they made in previous meetings and hold them accountable.
To build an actions page:
-
Click Actions on the side menu to navigate to that page. Edit this page.
-
Add the Create from template macro:
- Click Insert elements on the edit toolbar to open the macro search. Search for the
Task reportmacro. See Task report macro for more information. - Use these macro settings:
| Setting | Value |
|---|---|
| Space(s) and page(s) | Select the meetings section of your space from the menu. |
| Label(s) | Leave blank. |
| Assigned to | Leave blank. |
| Created by | Leave blank. |
| Created after | Use the default date. |
| Task status | Use the default setting: incomplete. |
| Number of tasks per page | Use the default setting: 20. |
| Columns to display | You can use the default setting. I like to remove the due date because my team doesn't typically assign due dates. I also think the assignee is a little redundant. So, I recommend using: description,assignee,location. |
| Sort by | Select assignee from the menu. |
| Reverse sort | Leave this box unchecked. |
- Optional: Create a few test meeting pages and assign actions to yourself to see if they show up correctly on your team pages.
After completing these steps, your Actions page will look similar to this example:
Next steps
To continue, complete the steps in part two of the tutorial series.